
BobWeb Form to Order
This plugin auto-creates a WooCommerce order on site #1 from a contact form entry on site #2. Works with Contact Form 7, Gravity Forms, Fluent Forms and WP Forms.
One time payment & money back guarantee
1 site license
Connect Fluent Forms, Contact Form 7, WPForms and Gravity Forms submissions to WooCommerce on another WordPress site, with field discovery and suggested mappings.
Installing the Plugin
When you buy the plugin, you'll get a zip file and a license key. Below are the steps on how to install it.
Or watch this 45s video on YouTube.
- In your WordPress admin dashboard, go to plugins and click on add plugin.
- On the next screen, click on "Upload Plugin" at the top of that screen.
- Select the zip you received from your computer and upload it.
- Click on the Install Now button.
- Click on the Activate Plugin button.
- Click on the settings link under the plugin's name in the plugins screen.
- Paste in your license key and click on Activate License.
Why this plugin exists
In addition to website work, I also run an entertainment company. That entertainment company uses multiple websites; a website for nationwide dj bookings, another website targeting my local region, another website for artist bookings etcetera. All of those websites have a contact form.
However, for CRM, sending out contracts and invoices, planning etcetera, I use one centralized WooCommerce environment on yet another website. Because WooCommerce is not only a great webshop system, it's also very capable as a CRM and bookings system – with the right plugins.
Before I built this plugin, I had to manually copy all data from the contact forms into WooCommerce. Now, that's all automated.
How the BobWeb Form To Order Plugin works
Now, a client fills in a contact form. The Form To Order plugin captures the data from that contact form, creates a new client in WooCommerce and adds all the data in their relevant fields. The plugin will automatically match most of the fields, but you can manually set them as well. In my case for example, I mapped the date of the event to the order date in WooCommerce. The plugin will also add the contact form as a note in WooCommerce. You can set which payment method should be used and which order status it should have.
Talking about order status, the plugin also has a custom order statutes feature. You can add new order statuses, or edit the label and color for the built-in order statuses.
The plugin also has an option to auto delete orders that still have a certain status after a certain number of days. In my case, if the order status is still "quotation sent" after 8 weeks, the order gets deleted. The client data also get deleted, which helps a lot to comply with European privacy laws, but only if this is the only order they've placed. So if a clients has multiple orders, that client will never get deleted. And of course, you can set if you only want to delete the order, or the client data as well.
Plugin settings
After you've activated your license, the plugin settings will appear.
Choosing the site role
In the first section of the plugin settings, you can set which role this site has: the source site that contains the form(s), or the receiving WooCommerce site that will create the orders.
The plugin will auto detect if the site has WooCommerce and / or forms installed, so if the site doesn't have WooCommerce installed, it won't show that options (same with forms, but most webshops do have at least a contact form).
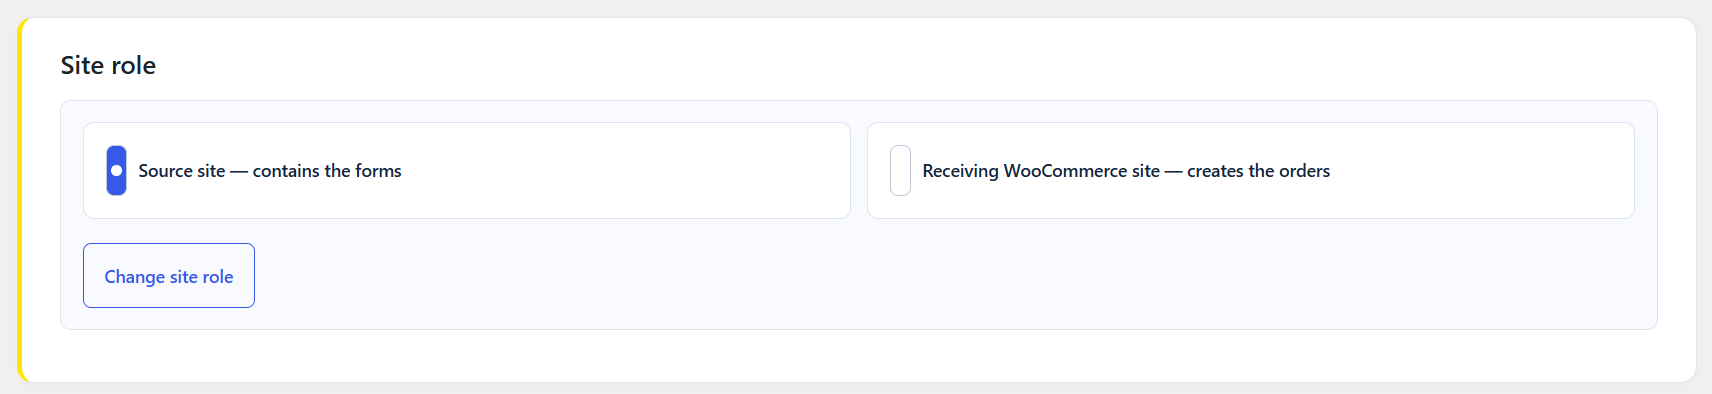
Source site settings
Which settings are available depends on the site role you choose in the first step. Below are the settings for the source site.
Setting up the connection
You set up the connection from the source site, but you need admin access on the WooCommerce site as well.
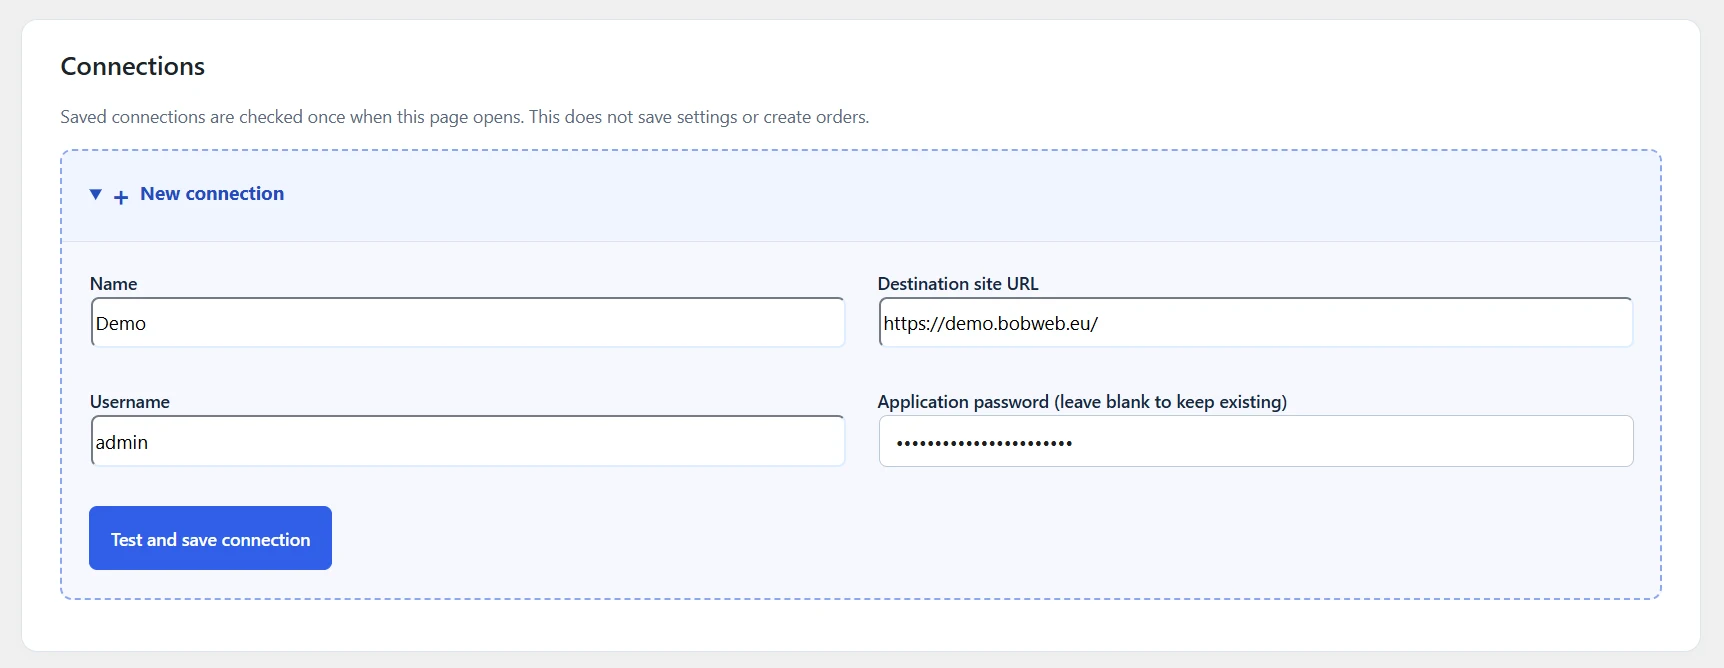
- Fill in a name for the connection. This can be anything, as long as it's clear to you what it is.
- Fill in the destination site URL. This is the website address that has the WooCommerce installation on it. So, if Amazon was your website (you wish :-D), the URL would be https://www.amazon.com/
- Now, log in to the receiving WooCommerce website. Go to users and edit a user with the administrator role.
- Copy the username. Not the nickname, first name, last name, displayed name; the actual username. That's the one you can't change. Paste that username in the username field in the connection setup.
- Scroll to "Application Passwords". Fill in a name, which again can be anything as long as it's clear to you (I would suggest using the same name you used in step 1) and click on "add application password".
- Copy the generated application password and paste it in the application password field of the connection setup.
- Click on "Test and save connection".
- The connection settings box should now turn green and a "Connection test passed" notice should appear.
- If the connection fails, a red notice should appear, telling you what's wrong. For example, "Incorrect password".
The plugin will automatically re-test the connection every time you open the settings panel.

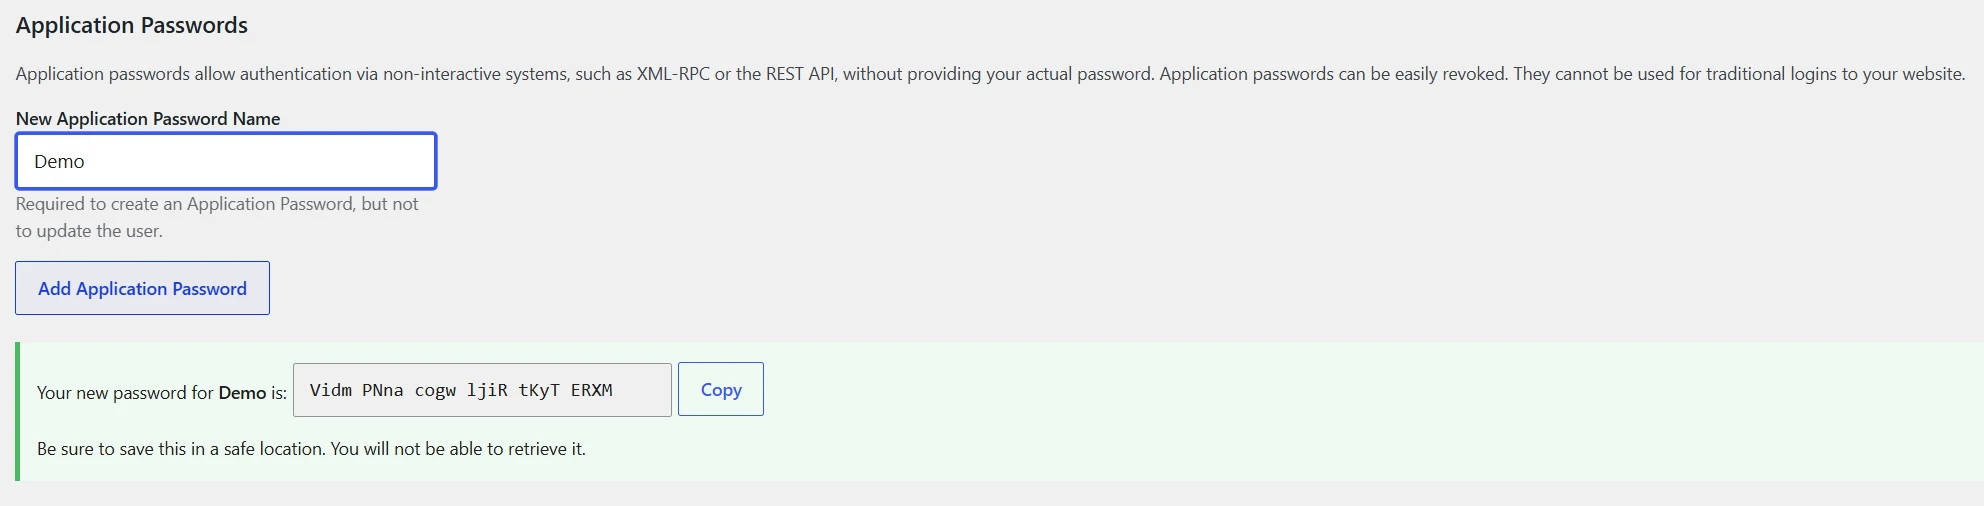
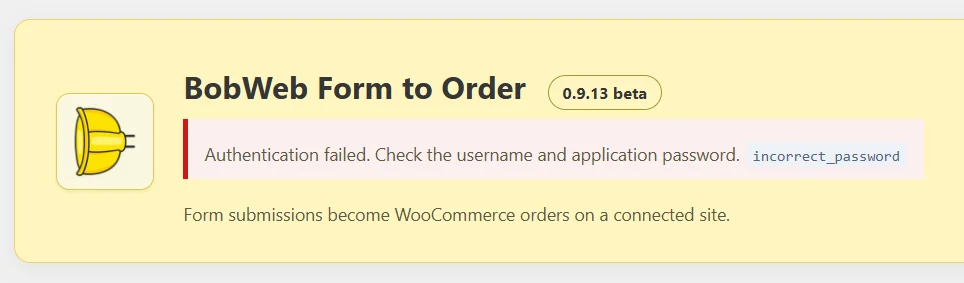
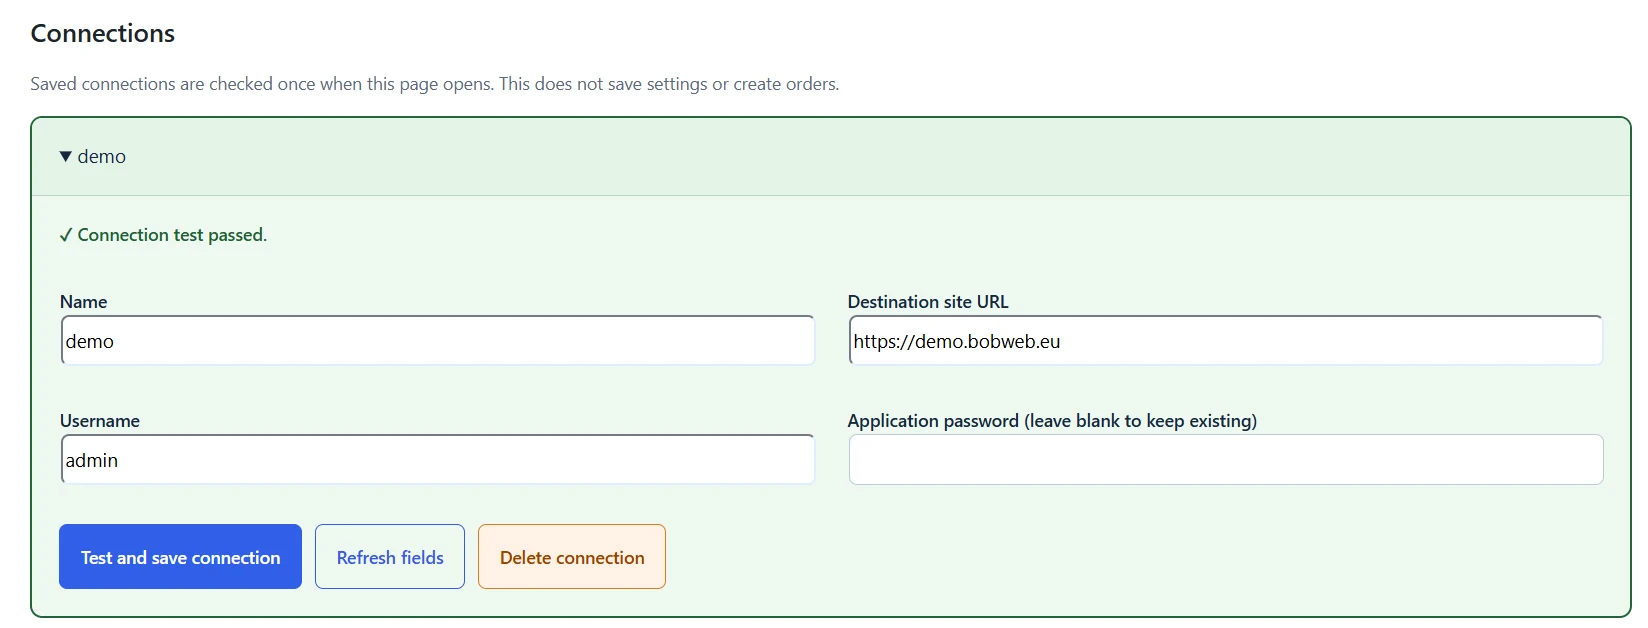
In the screenshot above, you also see the option "refresh fields" and "delete connection".
The refresh fields option will re-import all the data from the WooCommerce site, like order statuses, custom fields, products and payment methods. It will also refresh all the form fields from the source site. So if you've added one of the above and want to use them in the configuration, use the refresh fields button.
Forms and field mappings
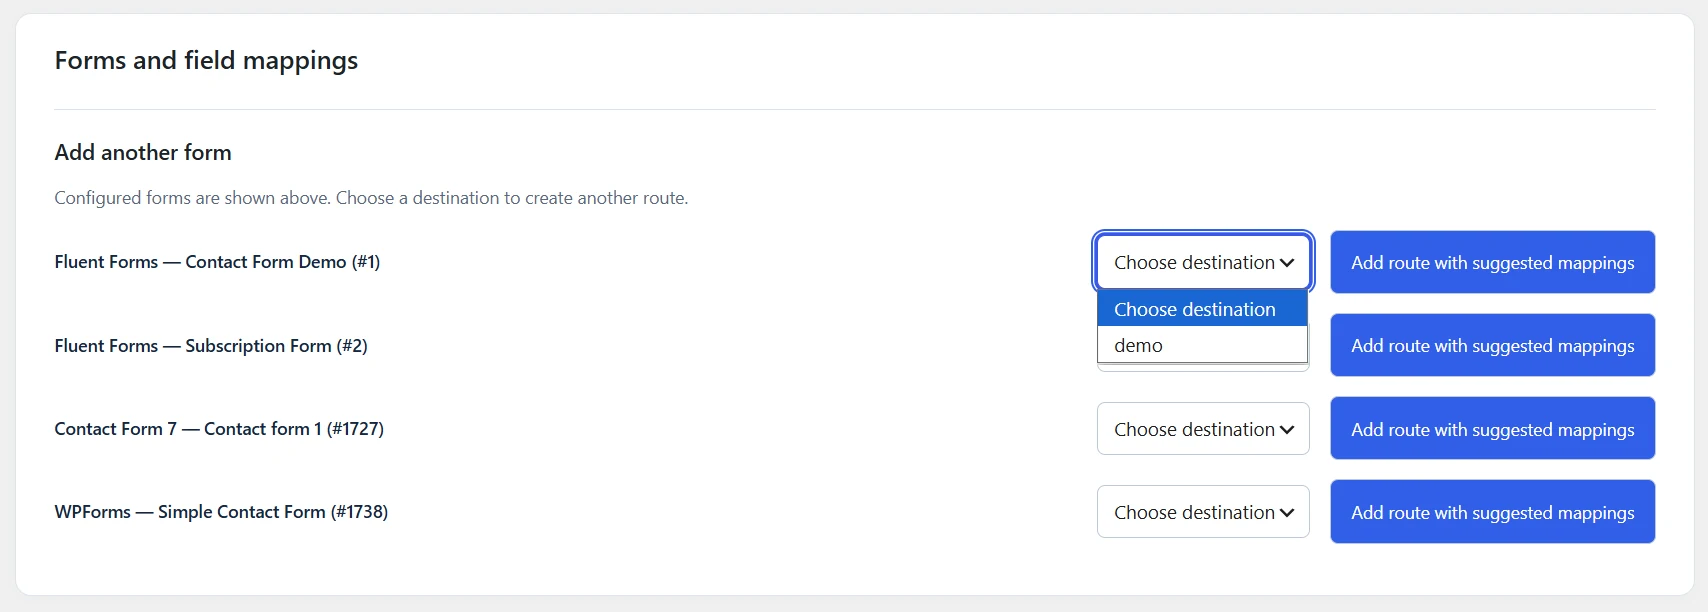
When the connection test passes, a new section "Forms and field mappings" will appear. The plugin will auto detect all the forms on your site. You can map any (or all) of your forms to WooCommerce by selecting the connection from the "choose destination" dropdown.
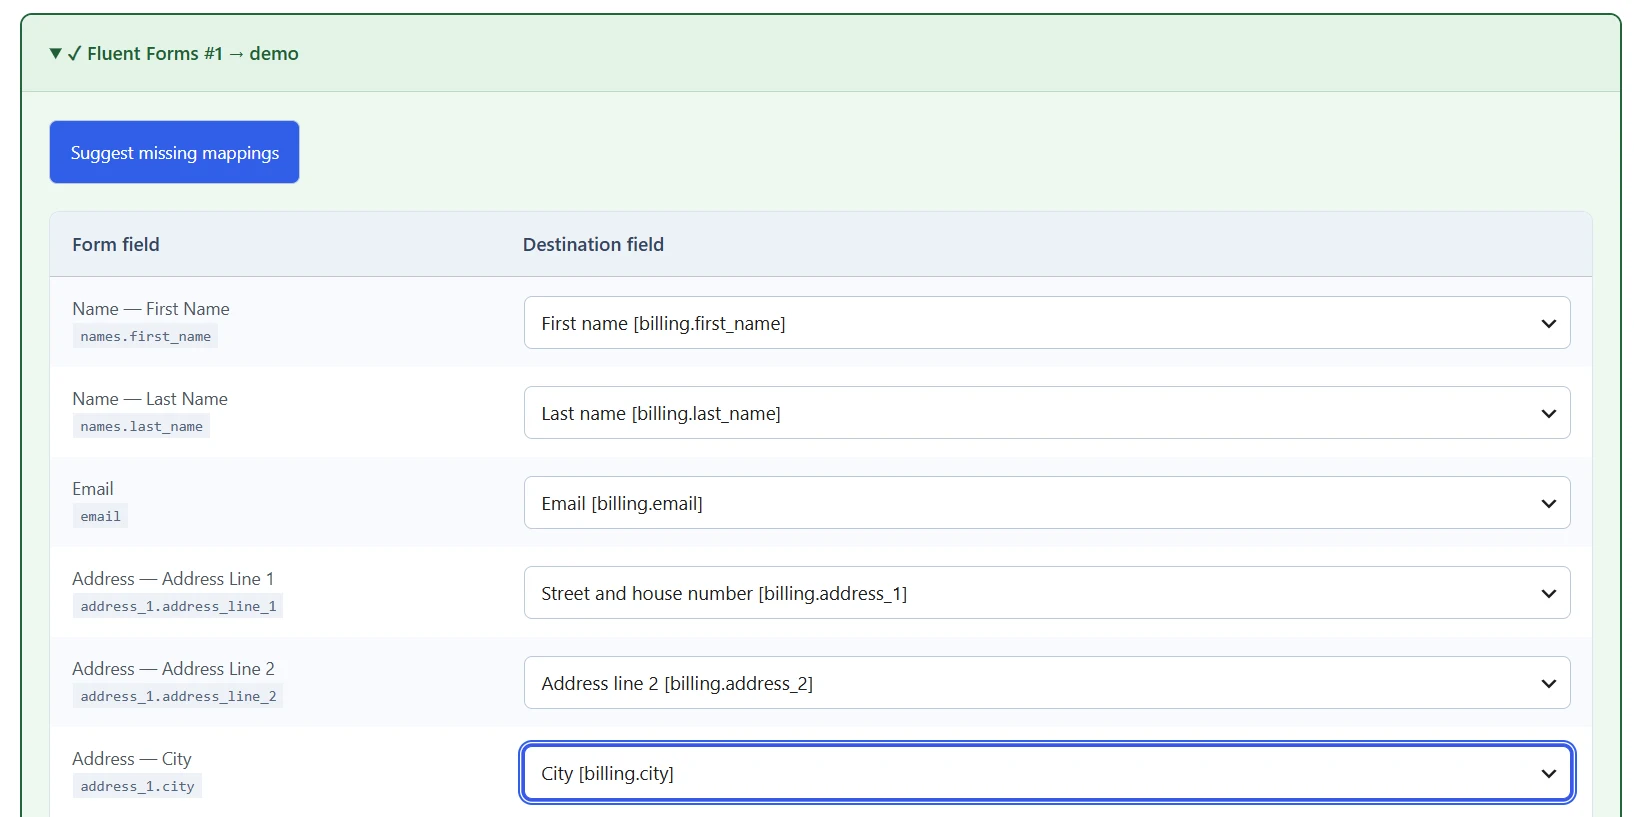
Then click "add route with suggested mappings", and the plugin will autodetect which fields are available in the selected form(s), and which fields are available in WooCommerce on the receiving site. It will automatically map most of the fields, so if you have an "address" field in your form, that will automatically be mapped to the "Billing Adress 1" field in WooCommerce, an e-mail address field will automatically be mapped to the "Billing email" field in Woo etcetera.
However, you can override the mapping of each field manually, so if you want the "address" field in your form to be the shipping address in WooCommerce, you can absolutely do that.
Setting a default product, order status en payment method
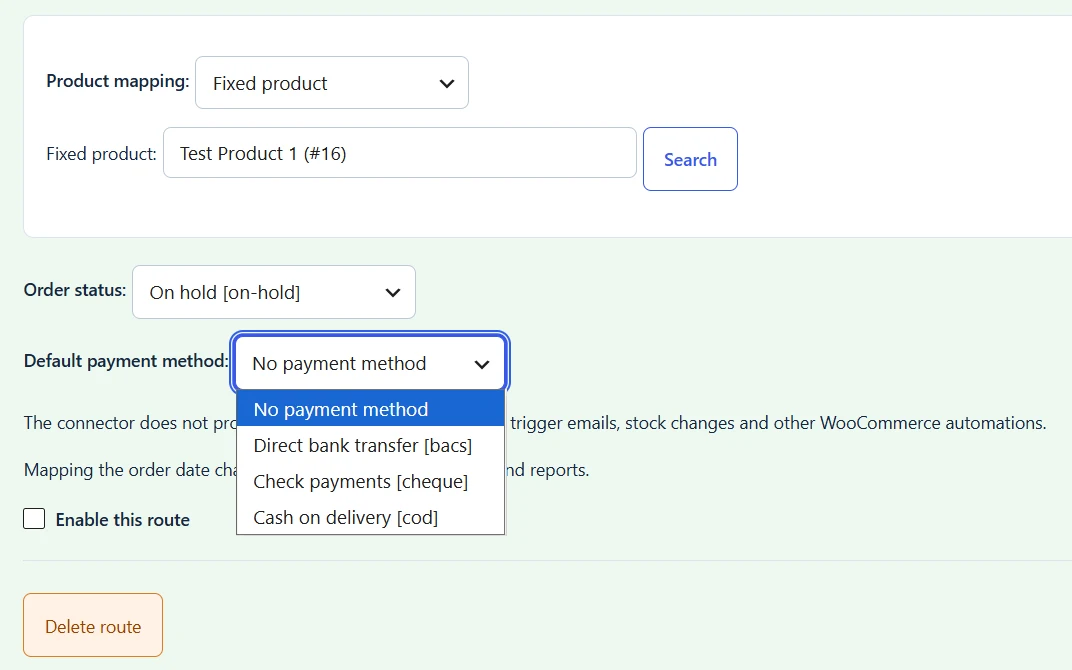
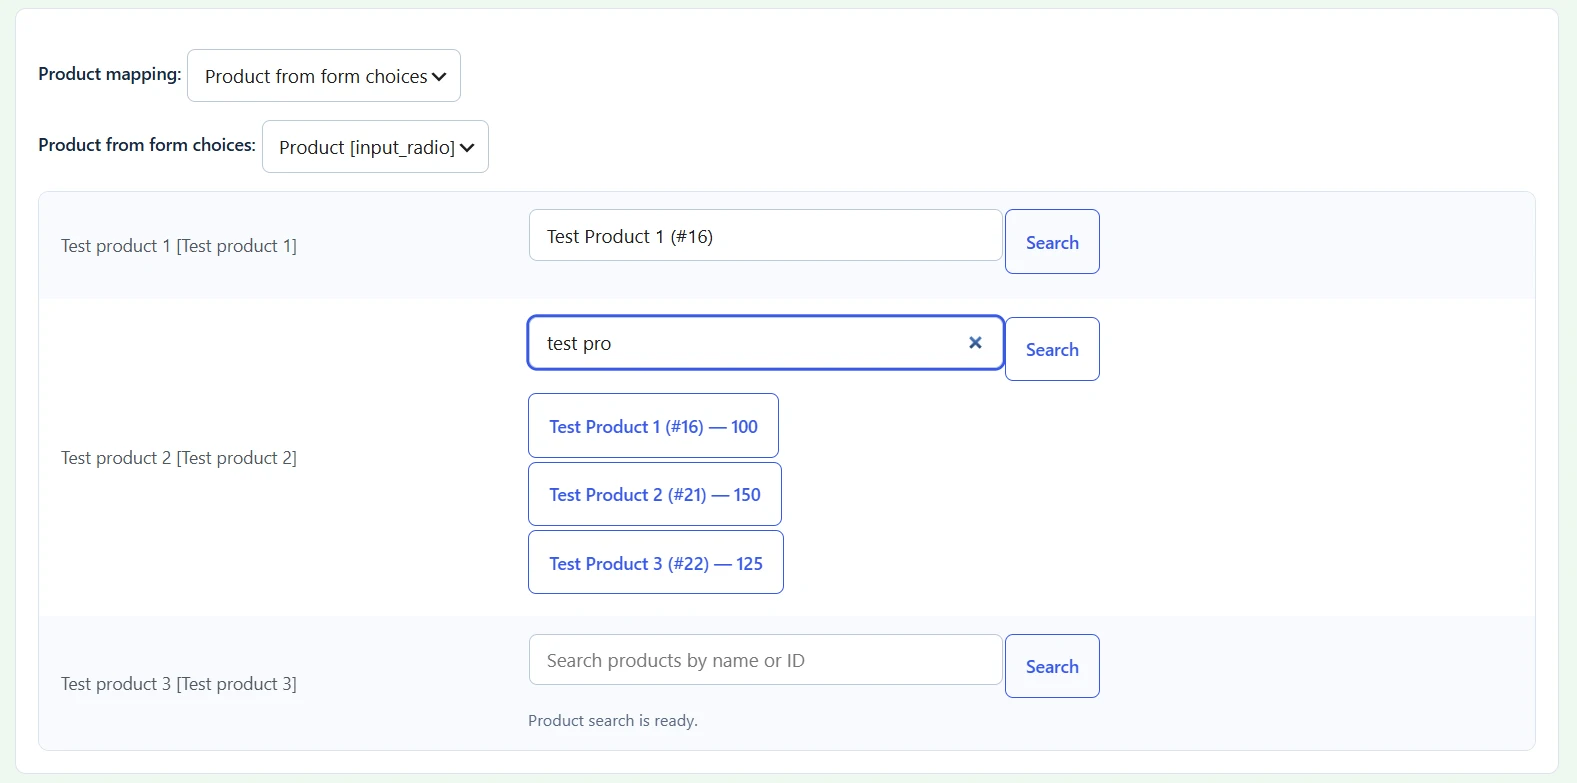
At the bottom of each form mapping, you can set a default product used in the created WooCommerce order. You can set that to be 1 fixed product, or map multiple products from a radio, checkbox or dropdown field.
Since the plugin knows which products are on the WooCommerce site, you can just search on the product name or ID.
You can also set a default order status and payment method in this section.
You can add custom order statuses in the WooCommerce site settings.
Enable the route
Don't forget to click the enable this route checkbox at the bottom. You'll also find a Delete route button here.
Save changes
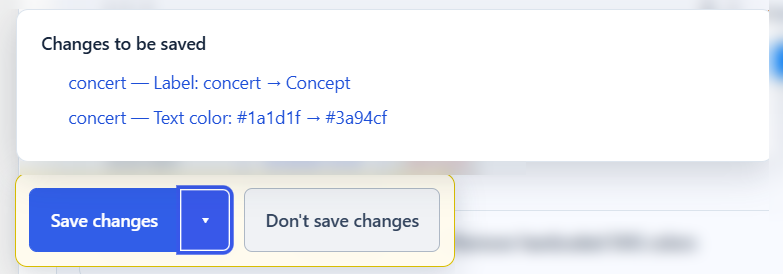
When you change any setting, a Save changes button appears in the left bottom corner. If you click the arrow next to the save button, it will give you an overview of which settings will be saved. Click on any of the items to scroll to that specific setting. Click on the "Don't save changes" button to not save any of the changes.
Deactivate your license
If you want to deactivate your license so you can use it on another site, you can do that at the bottom of the settings screen.
